Showing posts with label Holiday Ideas. Show all posts

Saturday, July 16, 2022

Christmas in July Part 2


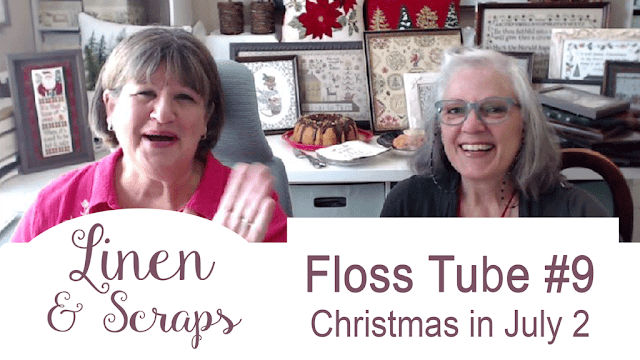
My cross stitchy neighbor, Kathy and I just uploaded our Christmas in July part @ video.  I was so excited to share Kathy's stunning Christmas samplers.  I even highlighted the one piece of Christmas cross stitch I have finished.  It's just missing the bow and miniature rolling pin on the top.  

This piece was made from 2 charts I printed from the Just Cross Stitching magazine DVD I bought that has all issues from 2001 to 2010, including the Christmas ornaments issues.  I just love how the Prairie Schooler Santa fit on top of the Good to Be Fat and Jolly Quote one.  Can't wait to finish off the top and put up in my kitchen this Christmas.  

Two of the other items I shared  were the Christmas Planner Notebook I made and the little booklet, covered with Graphic 45 papers to hold my "Christmas Chart Catalogue".  

For the Chart Catalogue folder, I used the same technique shown in our Floss Book Tutorial Video to make the book.  Then I cut some "library pockets" from craft paper with my Cricut and then printed and cut some "library cards" from a pdf I downloaded.    I am loving how easy it was to make and how easy it is to use to document all the facts about the Christmas cross stitch pieces I am working on.  I plan to add small pictures of the cross stitch pieces when they are complete.  It was so much fun using some of my older Christmas scrapbook papers and stickers and things to decorate the pages. 


The Christmas Planner notebook I made was inspired by a darling "free" chart from TangledThreads andThings 

I was so delighted to find this darling chart and had to stitch it right away.  It goes perfectly with the older  K and Company scrapbook papers I was hoarding.  Even found an avocado green binder at Office Depot that matched the papers perfectly.  Don't overlook the cute Noel Pillow chart that is on the Tangled Threads and Things site.  It is so charming!


And what's a Christmas celebration without something chocolate and made with a little holiday spirit?  Kathy and I are sharing some of our favorite holiday recipes and makes with each other.  My contribution to this week's celebration was a Bacardi Rum Cake.   You can find the recipe online at the Bacardi site, just be sure you are over legal drinking age to make this oh so rich cake!

Kathy shared her Marinated Grilled Shrimp Recipe.  They were great.  I just need to figure out how to keep Kathy bringing over the delicious goodies from now on when we tape our videos.  You can find the recipe on the Freebies page of this blog. 

It was such a thrill for me to get to see just some of Kathy's favorite Christmas samplers she has stitched throughout the years.  Each one was a masterpiece.  To see more just watch our video.  

Hope you enjoy and Merry Christmas in July to you!
Molly D


Sunday, October 3, 2021

A Few Fall Craft Ideas

It all started with finding a new group of friends that sew.  Since moving to El Paso, I have been blessed to find a wonderful, welcoming group of ladies that have a sewing and crafting group.  For our October meeting  we are going to be making a Halloween table runner.  I couldn't wait.  Yes, I did buy some beautiful fabric to bring to the meeting and make my table runner  during the meeting, but while shopping I found some gorgeous and grungy Tim Holtz fabric. 

I had looked on Pinterest to get ideas for fall table runners and came across one that was done with pumpkin appliques, in solid fabrics.  Now anyone who knows me, knows I love mixing prints and textures, so when I saw Tim's new fabric line from a company called Free Spirit, I was truly inspired.  Using different prints from his Abandoned line I had so much fun creating this new little table runner.  
  
Of course in full fall swing, I pulled out the fall decor I had and got busy decorating around the house.  Can you tell I love mixing turquoise with fall colors.    I used Metallic Gilding Polish and Glitter Kiss Polish from Creative Expressions to color some of the leaves a gorgeous turquoise. 
It's hard to see in the pictures, but I also added a hint of gold glitter polish to several of the leaves, just to have an extra bit of sparkle.  
Next up - Scrapbook pages.  And what other papers  did you think I would use but ones from a kit by Anna Griffin.   The paper embellishments on this layout were from Anna's kit.  The flowers are from Prima and the jeweled pieces are old old old Tiffany's Treasures I had in my stash from Petaloo.


On this more spooky one I used a few of my mica sprays from Lindy's Stamp gang in Hag's Wart Orange and another orange to give the two spider ephemera a bit of a blood splattered look.  Then I inked the edge with Golden Glow Opal Polish from Creative Expression. It gives it just a rich gilded look.  Along with the paper embellishments from Anna's kit I used a very old set of shaker stickers of old apothecary jars.  I knew I had held onto those stickers for a good reason.   Just waiting to use on these very spooky pages.

Continuing to play with fall ideas, I have created some themed card kits.  The top two Hello cards are using some vintage Stampin' Up! papers and dies I have.  And again, I lightly swiped some gold gilding polish on the basket weave embossed kraft layer on one of the cards. 


 I had so much fun designing the pumpkin shaped card on my Cricut.  The finished size of that card is 5" by 7", making it a perfect fit for a standard A7 envelope.

The Gnome and pumpkin artwork for the second card are some commercial designs I bought from Design Bundles.  So easy to use with the Cricut Print and Cut feature.  It's a great site for designer graphics and fonts. 

I hope you enjoyed seeing some of the things I have been working on for fall.  I know how much I love seeing all the creative projects shared on Pinterest and the web from so many others.  Hope I get to see some of your fall projects.  Please feel free to share a picture in the comments.

Happy Fall everyone,
Molly D

Wednesday, December 16, 2015

New Christmas Tags for 2015


Well was that fun or what?  I just spent the morning creating nine new tags to celebrate this Christmas season.  

I am on a mission to use up as much of my bits and pieces of scrips  and scraps that I have been hoarding for the last several years and thought making tags would let me use some of the itty bitty pieces I couldn't use on layout.  


I started with a base of the Julie Nutting for Prima paper tags.  They have a wonderul vintage feel to them and I love the size.  I sprayed each one with different combinations of my Lindys Stamp Gang sprays in tones of creme brulee, golds and other metallics.

While I was in a bling it up type frame of mind, I tore into my flower stash, found several I thought might work for the holidays, and sprayed some of them and added glitter and gilding to the rest.  


Then it was just a matter of gluing on all the little treasure pieces I had laid out in front of me.  And while it should have been oh so easy, I found I spent hours laying each one out and agonizing over the placement of each piece. 


Even deciding on the ribbons to use was such fun.  And made me feel so justified in having spent a small fortune over time building up this hoard of scrappy happy supplies.


The happiness of making these little charmers was even made all the merrier when I realized I had actually made a small dent in the holiday stash and might now have a little room to put away some of the new things I got delivered today.  

Sigh.....  Oh well, back to stash busting for me!  

I am wishing each of you a very Merry Christmas and happiest of New Years.  Now I am off to make some 12 x 12 layouts.  

Here's the video of these cuties:

Hugs, 
Molly


Monday, December 14, 2015

Make It Merry Mini Album and Die Storage idea from Tim H

Just wanted to share this oh so merry little Christmas mini album I just finished. It features the October Afternoon collection, Make it Merry.  I love the sweet retro look of the collection and the cheery feel of it.  


The album is constructed using medium weight chipboard as the base for each page.  I cut the rop papers for each page  7.5" tall by 6" wide.   Then I cut the papers to cover the pages just about a half to 3/4 of an inch bigger to give me room to "wrap" the papers around the edges. 


Once I had wrapped those around, I cut the papers to cover the back of each page just  1/4" smaller in each direction to glue on the back.  Be sure to check out my video for closeups of each page.  


Plus, I share in this video how I am storing my dies now,  ( I have a picture below of how it came out in my craft room so far).

Borrowed the idea after watching a Tim Holtz video where he mentioned this idea. Couldn't wait to give it a try, and I love it. 

Once I was inspired by all the dies I had forgotten I owned, I played a little bit with cutting the edges of my pockets and a few decorative pieces to add to this little mini.  Some of the newest dies I have are the Heartfelt Creations Ornaet Borders and Regal Borders and Pockets sets.  So pretty!  Just love the intricate styles and versatility of them!

Well, I hope this inspires you to take a new look at all of your olders supplies and have fun crafting!  

Hugs,
Molly


Wednesday, December 9, 2015

Easy Christmas Shaker Ornament Tutorial Share


Wanted to share this oh so easy Christmas Shaker Ornament tutorial I found. The link to xannero1's wonderful tutorial is on my video where I showed the ornaments I made from the inspiration. 

Couldn't resist taking advantage of the great weekend sales and am just loving using some of the super buys I found.  Two of my favorite new items are the Sizzix Precision Base plate.  Was amazed at the detail cuts I got from even tiny, intricate dies!  


Product Details
And the great buy on Stick it adhesive sheets I found on Blitsy!  (They had the best After Thanksgiving sale ever! While these might not still be available, it's always fun to check them out for great savings on crafting favorites!)  


Plus, I have a link to the Cricut Explore Cutting files I made...just remember you may have to pay a small fee if you don't have the monthly Cricut subscription or own the images I used to make these. 

I cut two pf each layer, to make matching fronts and backs. I used clear acrylic sheet to cut ovals to cover windows. Then I traced outline onto craft foam to cutout a spacer layer, cutting ithe a little smaller so it wouldn't  peek out of the sides.  Wished I had used a few more sequins, but will on next ones.  Can'the wait to make more.


Gold Ornament Cricut Cutting File ( this really is the one I used for the gold ornament, even though I picked silver colors for pic...sorry)


Silver Ornament Cricut Cutting File (and this really is the file I used for the silver ornament, even though I picked yellow colors for this pic...jeesh...)


Well I hope you have fun crafting and again, Merry Christmas and happiest of holidays to you and yours!
Molly

Tuesday, November 24, 2015

Easy How to - Christmas "Step Cards" with Anna Griffin Embellishments

Side view of card showing "mountain and valleys" of how to fold


 Wanted to share some quick and easy Christmas cards I made using a very simple "step card" tutorial I found on ScorPal's Blog. 


Now their measurements are a little different than the ones I show here, because I used cards I bought from Michael's for my base. But I found it very easy to adapt the scorelines to my needs. 


Now all this step card madness began with me buying an Anna Griffin Diecut Kit from HSN. It came with, I kid you not, 600 strips of printed cardstock just 5" long x 1.25" wide.  So what the heck is a crafter suppose to do with 600 of those things.  Plus, the kit came with 480 other pretty embellishments I knew I wanted to use to make Christmas cards.  So I decided on this step format to try to use some of these strips, but I also let me use up some of the scraps of pretty holiday papers I just couldn't bring myself to throw away.  


I ended up making 5 each of 4 styles.  I used my Cricut Explore to cut the adorable deer out of bronze cardstock from Michaels for the dees in forest card.   


For the sleigh card I only used Anna Griffin embellishments.  The sentiment layered die cuts on all the cards are from one of three of my Anna's card kits I have bought over the years.  So happy to be using some things from my stash!


But I think my favorite is the nativity card.  Using images from Cricut Design Space I cut the images out of metallic double sided poster board, gold foil paper and glitter cardstock for the star.     


I have shared a pretty rough sketch of the template for cutting and scoring a card to the dimensions I used.  But be sure to head to the Scor Pal Blog or Pinterest, where there are hundreds of wonderful examples of templates and how to's to make these quick and easy but dramatic cards.  I am betting these cards will be "keepers" that make it onto the mantels of friends and family.  

Well I hope you enjoy and please share if you make yourself some!
Have fun creating, 
Molly


Thursday, November 19, 2015

Happy Planner Freebie Christmas To Do List Inserts

Just a quick post to share some   insert pages I made for my Happy Planner.  


Loved making these custom To Do and List pages using vintage artwork I found on Pinterest.


I printed them on both sides of 8 1/2 x 11 sheet of paper then just trimmed to fit.  


Plus I shared pictures of the new cover I made for this Christmas season.  Sure thought the Peace on Earth paper was so perfect for these troubled times.  And a quick peak at how the pages look in the book.  

Please feel free to use for personal use. Happiest of holidays to you and yours!


Sunday, November 23, 2014

Blessed so much more than I deserve


Well, I want to wish everyone a very happy Thanksgiving!  I recently had a party for a few of my dear scrapbooking friends and it was wonderful.  The theme I chose for this year's party was "Blessed Beyond Measure".  I feel so blessed everyday, and just wanted to share that sentiment with my friends.  

The picture above is just a little piece of wall art I made for the season.  It all started with a frame I bought from a garage sale for $1.  Yep, one dollar.  Then I just covered the art in the middle with a piece of 12 x 12 scrapbook paper from K and Company, from the very old Alleghany Plum collection that I have been hoarding.   The sentiment added on top was something I "scraplifted" and recreated on my computer on photoshop.  It just said it so much better than I could.  "Thank you God for blessing me so much more than I deserve. "

This second picture is another seasonal piece I made from a second frame from a garage sale.  Covered the background with some very bright orange embossed wrapping paper, then just used more K and Company papers to make the panels.  Again, the sentiment was something I created using photoshop on my computer

A dear friend even helped me create a layout for each of the ladies to create that helped celebrate the season too...


Of course the house was decorated for Thanksgiving and fall, but we celebrated Christmas as well by making some very pretty Tussie Mussies.  The ladies really outdid themselves with all their creative skills and every one was so unique and so beautiful And it was just too much fun watching them "playing" at making their own.  Here's just a few of the ladies with their gorgeous creations!  

I want to thank all these dear friends for their kindness and generosity.  We had a truly wonderful time!  And the food, oh my gosh golly, the food that night was outstanding.  So I hope each and every one of you and your families have a very wonderful and blessed Thanksgiving.  And I just pray you all have as much fun as we did!  I am so looking forward to our family celebration now!  

Happy Thanksgiving to you all
Hugs, Molly