Sunday, November 29, 2015

Easy Tutorial Create Shadow Layers to Cut with Cricut Explore Using


Here's a video I was excited to create and share, because it how I learned to make "shadow" layers for titles and images to import into Cricut Explore Design Space and cut !  

This is a feature that the incredible team at Cricut is working on delivering for us, BUT they are also busy on creating lots of other upgrades first and I just couldn't wait.  So I piddled around with my Photoshop Elements 14 and taught myself this quick method.  


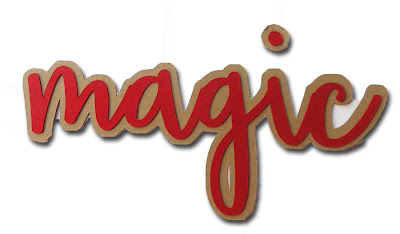
It really is so easy it felt like magic to me and I can't wait to create loads more titles for my scrapbooking, card making, paper crafting projects.  Here's a few pictures of the finished titles I made so far.  

Hope you enjoy and have a wonderful holiday season ahead!
Molly D


Wednesday, November 25, 2015

Freebie December Happy Planner Stickers to Celebrate Sybil B

Sybil's challenge is closed, but still wanted to share these fun stickers!  Happy Holidays to everyone.

Sybil B is having a fun challenge to celebrate her reaching 2500 subscribers on YouTube.  If you are not already a subscriber, please head over there and check out her wonderful channel.  

In honor of her and her great milestone, I wanted to share these fun planner stickers, perfect for December.

Here's the link to Sybil's channnel:
Sybil B

I know you will love it!
Have fun crafting,
Molly D


Tuesday, November 24, 2015

Easy How to - Christmas "Step Cards" with Anna Griffin Embellishments

Side view of card showing "mountain and valleys" of how to fold


 Wanted to share some quick and easy Christmas cards I made using a very simple "step card" tutorial I found on ScorPal's Blog. 


Now their measurements are a little different than the ones I show here, because I used cards I bought from Michael's for my base. But I found it very easy to adapt the scorelines to my needs. 


Now all this step card madness began with me buying an Anna Griffin Diecut Kit from HSN. It came with, I kid you not, 600 strips of printed cardstock just 5" long x 1.25" wide.  So what the heck is a crafter suppose to do with 600 of those things.  Plus, the kit came with 480 other pretty embellishments I knew I wanted to use to make Christmas cards.  So I decided on this step format to try to use some of these strips, but I also let me use up some of the scraps of pretty holiday papers I just couldn't bring myself to throw away.  


I ended up making 5 each of 4 styles.  I used my Cricut Explore to cut the adorable deer out of bronze cardstock from Michaels for the dees in forest card.   


For the sleigh card I only used Anna Griffin embellishments.  The sentiment layered die cuts on all the cards are from one of three of my Anna's card kits I have bought over the years.  So happy to be using some things from my stash!


But I think my favorite is the nativity card.  Using images from Cricut Design Space I cut the images out of metallic double sided poster board, gold foil paper and glitter cardstock for the star.     


I have shared a pretty rough sketch of the template for cutting and scoring a card to the dimensions I used.  But be sure to head to the Scor Pal Blog or Pinterest, where there are hundreds of wonderful examples of templates and how to's to make these quick and easy but dramatic cards.  I am betting these cards will be "keepers" that make it onto the mantels of friends and family.  

Well I hope you enjoy and please share if you make yourself some!
Have fun creating, 
Molly


Thursday, November 19, 2015

Happy Planner Freebie Christmas To Do List Inserts

Just a quick post to share some   insert pages I made for my Happy Planner.  


Loved making these custom To Do and List pages using vintage artwork I found on Pinterest.


I printed them on both sides of 8 1/2 x 11 sheet of paper then just trimmed to fit.  


Plus I shared pictures of the new cover I made for this Christmas season.  Sure thought the Peace on Earth paper was so perfect for these troubled times.  And a quick peak at how the pages look in the book.  

Please feel free to use for personal use. Happiest of holidays to you and yours!


Wednesday, November 4, 2015

Freebie Stickers for MAMBI Happy Planner!

Just like so many of you out there, I love playing with my MAMBI (me and my big ideas) Happy Planner.  And making my own stickers for it makes me even happier!  

The first set of stickers I created for my November pages were made with some of my favorite pictures from my  Pinterest Autumn board and one of our own fall decor.  

Most of these darling stickers feature artwork from On Sutton Place's blog.  She creates and shares the most magnificent artwork and decorating ideas.  If you have never stopped by there,  take a minute and I am sure you will be happy you did.  You can easily  download some amazing printables she has created for fall and Christmas.  


This next set of stickers are the Freebies (for your personal use) that I created using Adobe's Photoshop Elements 14.  Just got the latest Elements and love it.  It is so easy to use and the new features for photo editing are easy and very very effective.  
I used vintage royalty free downloads and clipping out the background and editing colors was easier than ever!


Well, I hope you enjoy this latest batch of stickers!  

Hugs,
Molly