Wednesday, December 30, 2015

2016 New Year Freebie Stickers for Happy Planner

Well I couldn't decide!  I was making a new cover and stickers for my MAMBI Happy Planner and I just couldn't decide.  Bright with watercolor fun or gardens of pink and cream flowers?  So of course I did both.

Here are the stickers I made, and wanted to share.  Please feel free to copy and print for your personal use.  (Just  click on the photo, and save to your favorite file or print to use now.)

So I think you can see, I was completely in two very different moods when I created these stickers.

Which brings me to my true dilemma.  I am trying to set my goals for 2016 and just can't seem to focus in on just one, two or even three.  It seems I have a certifiable case of crafting attention deficit disorder.  But isn't that the real beauty of crafting?   Creating something that expresses how you feel, at that moment.   


Well, anywho, back to my Happy Planner. Along with the stickers, I made two different covers. 

For the watercolor one, I downloaded some graphic artwork from Dress your Tech which I found on Pinterest.  Wowzer they have great looking graphics. Intended for use on phones, tablets and computers, but hey why now use as craft designer paper too!  


For the beautiful shabby chic pink one, I scanned a sheet of pinkpaislee paper I had stashed away years ago, then "transformed" the size in Photoshop elements 14.  Then I "erased" the wording they had in the white frame and replaced with the year.

I made several "insert" sheets to coordinate with the watercolor cover, as well as two other sticker sheets, using great artwork I downloaded from Pinterest.  Here's a peek at the two other sheets. Head over to my Pinterest boards, Planners and Journaling Printables and Printables and Digital Fun, to see pins from the original pinners.


I will be posting a video later, showing my planner, these stickers and extra insert pages I made to coordinate with the watercolor cover as soon as I can.  But for now, I am just having fun playing with all these pretty things!

Happiest of New Years to you!
Have fun creating,
Molly


Wednesday, December 16, 2015

New Christmas Tags for 2015


Well was that fun or what?  I just spent the morning creating nine new tags to celebrate this Christmas season.  

I am on a mission to use up as much of my bits and pieces of scrips  and scraps that I have been hoarding for the last several years and thought making tags would let me use some of the itty bitty pieces I couldn't use on layout.  


I started with a base of the Julie Nutting for Prima paper tags.  They have a wonderul vintage feel to them and I love the size.  I sprayed each one with different combinations of my Lindys Stamp Gang sprays in tones of creme brulee, golds and other metallics.

While I was in a bling it up type frame of mind, I tore into my flower stash, found several I thought might work for the holidays, and sprayed some of them and added glitter and gilding to the rest.  


Then it was just a matter of gluing on all the little treasure pieces I had laid out in front of me.  And while it should have been oh so easy, I found I spent hours laying each one out and agonizing over the placement of each piece. 


Even deciding on the ribbons to use was such fun.  And made me feel so justified in having spent a small fortune over time building up this hoard of scrappy happy supplies.


The happiness of making these little charmers was even made all the merrier when I realized I had actually made a small dent in the holiday stash and might now have a little room to put away some of the new things I got delivered today.  

Sigh.....  Oh well, back to stash busting for me!  

I am wishing each of you a very Merry Christmas and happiest of New Years.  Now I am off to make some 12 x 12 layouts.  

Here's the video of these cuties:

Hugs, 
Molly


Monday, December 14, 2015

Make It Merry Mini Album and Die Storage idea from Tim H

Just wanted to share this oh so merry little Christmas mini album I just finished. It features the October Afternoon collection, Make it Merry.  I love the sweet retro look of the collection and the cheery feel of it.  


The album is constructed using medium weight chipboard as the base for each page.  I cut the rop papers for each page  7.5" tall by 6" wide.   Then I cut the papers to cover the pages just about a half to 3/4 of an inch bigger to give me room to "wrap" the papers around the edges. 


Once I had wrapped those around, I cut the papers to cover the back of each page just  1/4" smaller in each direction to glue on the back.  Be sure to check out my video for closeups of each page.  


Plus, I share in this video how I am storing my dies now,  ( I have a picture below of how it came out in my craft room so far).

Borrowed the idea after watching a Tim Holtz video where he mentioned this idea. Couldn't wait to give it a try, and I love it. 

Once I was inspired by all the dies I had forgotten I owned, I played a little bit with cutting the edges of my pockets and a few decorative pieces to add to this little mini.  Some of the newest dies I have are the Heartfelt Creations Ornaet Borders and Regal Borders and Pockets sets.  So pretty!  Just love the intricate styles and versatility of them!

Well, I hope this inspires you to take a new look at all of your olders supplies and have fun crafting!  

Hugs,
Molly


Wednesday, December 9, 2015

Easy Christmas Shaker Ornament Tutorial Share


Wanted to share this oh so easy Christmas Shaker Ornament tutorial I found. The link to xannero1's wonderful tutorial is on my video where I showed the ornaments I made from the inspiration. 

Couldn't resist taking advantage of the great weekend sales and am just loving using some of the super buys I found.  Two of my favorite new items are the Sizzix Precision Base plate.  Was amazed at the detail cuts I got from even tiny, intricate dies!  


Product Details
And the great buy on Stick it adhesive sheets I found on Blitsy!  (They had the best After Thanksgiving sale ever! While these might not still be available, it's always fun to check them out for great savings on crafting favorites!)  


Plus, I have a link to the Cricut Explore Cutting files I made...just remember you may have to pay a small fee if you don't have the monthly Cricut subscription or own the images I used to make these. 

I cut two pf each layer, to make matching fronts and backs. I used clear acrylic sheet to cut ovals to cover windows. Then I traced outline onto craft foam to cutout a spacer layer, cutting ithe a little smaller so it wouldn't  peek out of the sides.  Wished I had used a few more sequins, but will on next ones.  Can'the wait to make more.


Gold Ornament Cricut Cutting File ( this really is the one I used for the gold ornament, even though I picked silver colors for pic...sorry)


Silver Ornament Cricut Cutting File (and this really is the file I used for the silver ornament, even though I picked yellow colors for this pic...jeesh...)


Well I hope you have fun crafting and again, Merry Christmas and happiest of holidays to you and yours!
Molly

Thursday, December 3, 2015

Great Blog for Stamping and Card Making to Share

   I hope I am not telling you something you already know, but THE best blog and videos for cardmaking and stamping tutorials, in my opinion is Jennifer McGuires.  She is so thoughtful, thorough and fun in her presentations.  And the styles and techniques she uses are just awesome.  

Jennifer has created a new website,and it has many great new features.  I love tagging my favorite videos and can go back to them for quick referrals anytime.  Plus, she has playlists on her channel that cover a wide range of subjects, that make you feel like an expert in no time.

And right now, she is starting a "My Favorite Things" series of videos where she share her most loved tools, supplies and techniqes.  Don't miss it.  She even shares a discount code for many of the items she features.  

So if you are looking to really improve your stamping, foiling, die cutting, cardmaking skills, head over to  Jennifer's Blog.   It has quickly become one of my 
"Favorite Things" of 2015.  Just wanted to share!

Have fun crafting,
Molly D

Sunday, November 29, 2015

Easy Tutorial Create Shadow Layers to Cut with Cricut Explore Using


Here's a video I was excited to create and share, because it how I learned to make "shadow" layers for titles and images to import into Cricut Explore Design Space and cut !  

This is a feature that the incredible team at Cricut is working on delivering for us, BUT they are also busy on creating lots of other upgrades first and I just couldn't wait.  So I piddled around with my Photoshop Elements 14 and taught myself this quick method.  


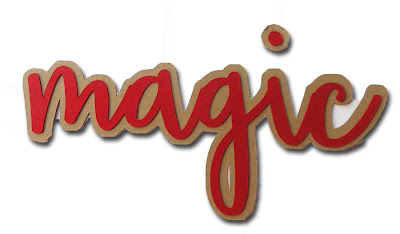
It really is so easy it felt like magic to me and I can't wait to create loads more titles for my scrapbooking, card making, paper crafting projects.  Here's a few pictures of the finished titles I made so far.  

Hope you enjoy and have a wonderful holiday season ahead!
Molly D


Wednesday, November 25, 2015

Freebie December Happy Planner Stickers to Celebrate Sybil B

Sybil's challenge is closed, but still wanted to share these fun stickers!  Happy Holidays to everyone.

Sybil B is having a fun challenge to celebrate her reaching 2500 subscribers on YouTube.  If you are not already a subscriber, please head over there and check out her wonderful channel.  

In honor of her and her great milestone, I wanted to share these fun planner stickers, perfect for December.

Here's the link to Sybil's channnel:
Sybil B

I know you will love it!
Have fun crafting,
Molly D


Tuesday, November 24, 2015

Easy How to - Christmas "Step Cards" with Anna Griffin Embellishments

Side view of card showing "mountain and valleys" of how to fold


 Wanted to share some quick and easy Christmas cards I made using a very simple "step card" tutorial I found on ScorPal's Blog. 


Now their measurements are a little different than the ones I show here, because I used cards I bought from Michael's for my base. But I found it very easy to adapt the scorelines to my needs. 


Now all this step card madness began with me buying an Anna Griffin Diecut Kit from HSN. It came with, I kid you not, 600 strips of printed cardstock just 5" long x 1.25" wide.  So what the heck is a crafter suppose to do with 600 of those things.  Plus, the kit came with 480 other pretty embellishments I knew I wanted to use to make Christmas cards.  So I decided on this step format to try to use some of these strips, but I also let me use up some of the scraps of pretty holiday papers I just couldn't bring myself to throw away.  


I ended up making 5 each of 4 styles.  I used my Cricut Explore to cut the adorable deer out of bronze cardstock from Michaels for the dees in forest card.   


For the sleigh card I only used Anna Griffin embellishments.  The sentiment layered die cuts on all the cards are from one of three of my Anna's card kits I have bought over the years.  So happy to be using some things from my stash!


But I think my favorite is the nativity card.  Using images from Cricut Design Space I cut the images out of metallic double sided poster board, gold foil paper and glitter cardstock for the star.     


I have shared a pretty rough sketch of the template for cutting and scoring a card to the dimensions I used.  But be sure to head to the Scor Pal Blog or Pinterest, where there are hundreds of wonderful examples of templates and how to's to make these quick and easy but dramatic cards.  I am betting these cards will be "keepers" that make it onto the mantels of friends and family.  

Well I hope you enjoy and please share if you make yourself some!
Have fun creating, 
Molly


Thursday, November 19, 2015

Happy Planner Freebie Christmas To Do List Inserts

Just a quick post to share some   insert pages I made for my Happy Planner.  


Loved making these custom To Do and List pages using vintage artwork I found on Pinterest.


I printed them on both sides of 8 1/2 x 11 sheet of paper then just trimmed to fit.  


Plus I shared pictures of the new cover I made for this Christmas season.  Sure thought the Peace on Earth paper was so perfect for these troubled times.  And a quick peak at how the pages look in the book.  

Please feel free to use for personal use. Happiest of holidays to you and yours!


Wednesday, November 4, 2015

Freebie Stickers for MAMBI Happy Planner!

Just like so many of you out there, I love playing with my MAMBI (me and my big ideas) Happy Planner.  And making my own stickers for it makes me even happier!  

The first set of stickers I created for my November pages were made with some of my favorite pictures from my  Pinterest Autumn board and one of our own fall decor.  

Most of these darling stickers feature artwork from On Sutton Place's blog.  She creates and shares the most magnificent artwork and decorating ideas.  If you have never stopped by there,  take a minute and I am sure you will be happy you did.  You can easily  download some amazing printables she has created for fall and Christmas.  


This next set of stickers are the Freebies (for your personal use) that I created using Adobe's Photoshop Elements 14.  Just got the latest Elements and love it.  It is so easy to use and the new features for photo editing are easy and very very effective.  
I used vintage royalty free downloads and clipping out the background and editing colors was easier than ever!


Well, I hope you enjoy this latest batch of stickers!  

Hugs,
Molly 


Tuesday, October 13, 2015

Halloween Scrapbook Layouts..Stash Busting


Wanted to share just a few Halloween inspired scrapbook layouts I made last weekend.  I say Halloween inspired, because there will be no trick or treating for this old witch.  All the kids in the neighborhood have grown up and moved on.  And all the grandkids have all kind of safe fun things to do at their schools or churches, so alas, no excuse at all to overbuy candy, in hopes of a door bell ring. 

I love Halloween and have loads of papers and embellies, collected over the years.  So a big big thank you so much to my dear friend Pam, for suggesting we go on a 30 day long fast of buying new scrapbook supplies.   I have had so much fun making these layouts with items I have had in my stash for years, maybe even over a decade for some.  

Now I have to admit, we made the deal on Friday, October 2nd, and I had to make an amendment to my start date...I mean Anna Griffin was on HSN on the 7th and there was no way possible I was not going to buy something from that show....teeheehee.

The black glitter die cuts on these layout are made with Anna Griffin Cuttlebug dies, Flourish collections.  I just cut one of them in half to make a topper and bottom decoration for the "title" 

I printed from a darling saying I found on Pinterest.  Use this link to head on over to  my Pinterest boards and check out the Autumn, Printables and Planner boards for lots of great Halloween and Autumn art to play with.  I use Photoshop Elements 11 to resize, recolor and clean up vintage artwork.  So you will notice I have "pulled out" some parts of vintage postcards to make the cutouts.  

The papers are a fun mixture of Graphic 45, K and Company, Authentique, even some very very old Daisy D.  Then I just used some fall flowers, on sale for 60% off at Michaels, and paper flowers from my stash.  Just colored them with Lindy's Stamp Gang sprays and used stamens and bling to add some texture.  Heck, I even used some oooooold brads, keys and ribbons to add layers to the pages.  


 I don't usually like "fussy cutting", but this gorgeous page from Graphic 45's Time to Flourish October papers just had to be added to my pages.  Don't you love the title I printed from Pinterest.  I am loving how these  pages just fit into my grown up version of Halloween. Fun but candy and costume free...sigh...it's heck growing up.


Have fun crafting and have a safe and Happy Halloween!