Thursday, August 3, 2017

August Specials and Host Code for gifts with purchase!

So excited to share my August Specials and project ideas with you!


Welcome to August!  I can't wait for cooler weather and the kick-off  to a wonderful holiday season!  Let's get right to the good stuff, that will help you get off to a fun and creative season...


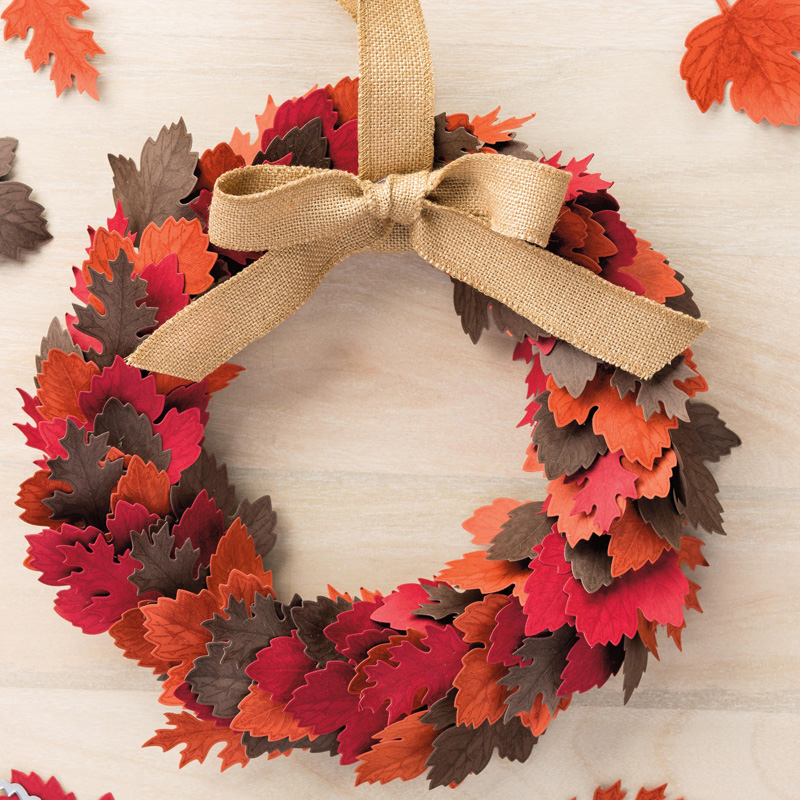
A very good friend of mine asked me to make some cards to be sent to share with military personnel...for them to send to loved ones.  I quickly made a dozen cards for her to send off and just wanted to show you a quick pic of a couple.  I used the Pumpkin kit I received as a gift from Stampin' Up!  It was intended to be shaker cards with sequins, but since you can't use any shiny for the cards for our military, I just lined the leaf openings with watercolor paper I "smooshed" with fall color inks.  I love how they turned out.  Simple, yes, but I hope they enjoy!  


Now here's some fun news to share with you this first week of August...

#1 -Use the August host code  ER7BYD6R on your Stampin' Up! order, between now and August 25th and
    Carols of Christmas Clear-Mount Bundle
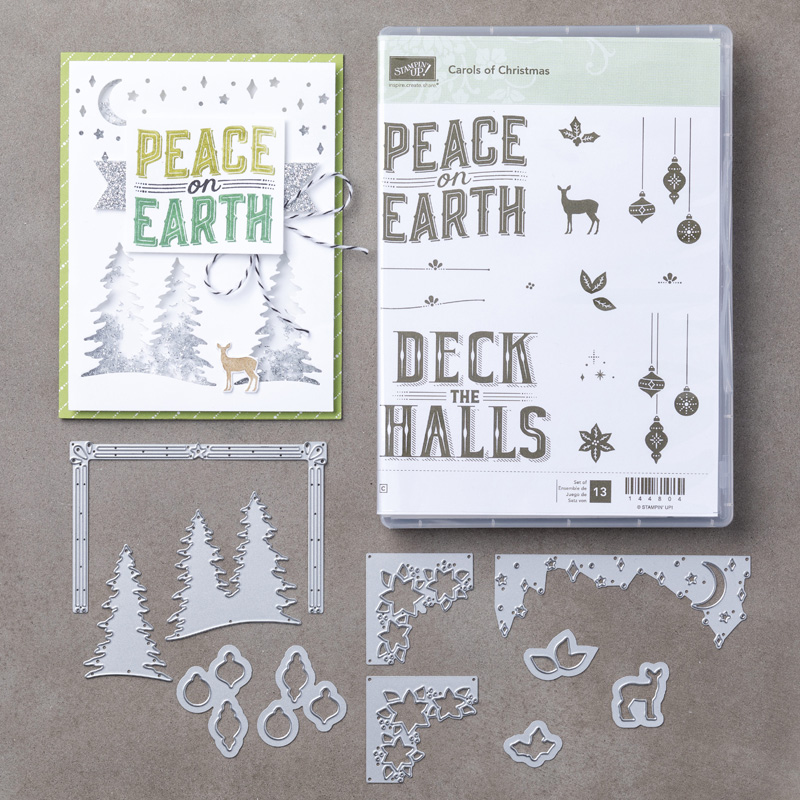
    Shop now: Carols of Christmas bundle!
  • Order the Carols of Christmas bundle, using the host code above and you will receive 4 card kits with step by step instructions, to get you started using your great bundle!  

  • Wanting to order something different?   just use the host code above on your order and for any order over $45, before shipping and taxes, and I will send you 3 card kits with precut pieces and step by step instructions!  
 
  • Please remember, if your order is over $150, do not use the host code.  Any order of $150 or more, before taxes and shipping, are eligible for Stampin' Rewards!  In addition to the Stampin' Up! Rewards,  I will still send you the PDF's and Card Kits!  

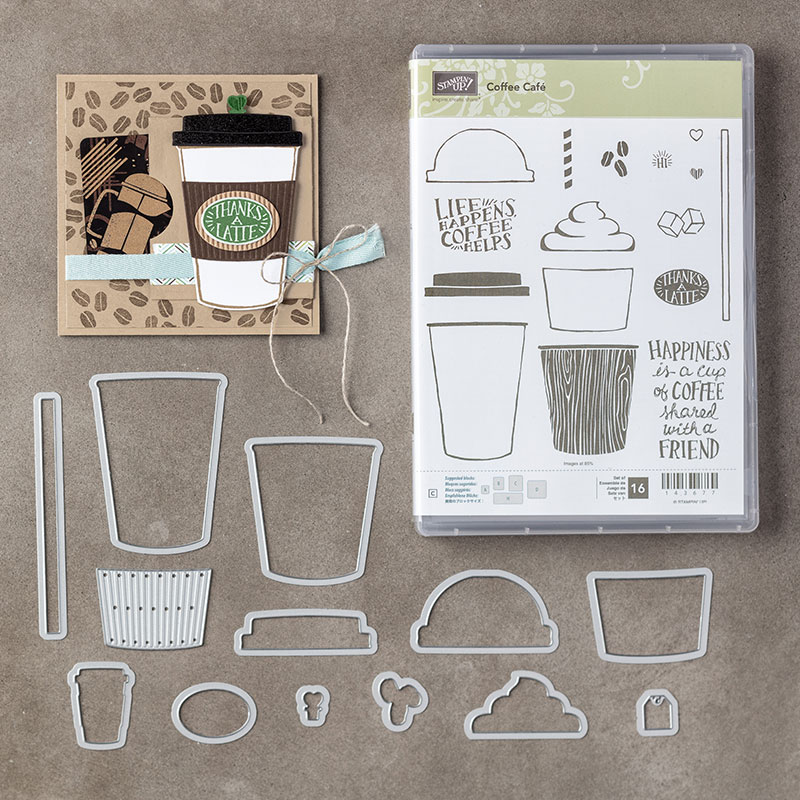
Here's a video I did showcasing two sets... the Gorgeous new Carols of Christmas and one of my other favorites, Colorful Seasons.  It's so versatile.  Will let you create a year's worth of projects.  Hope you enjoy!


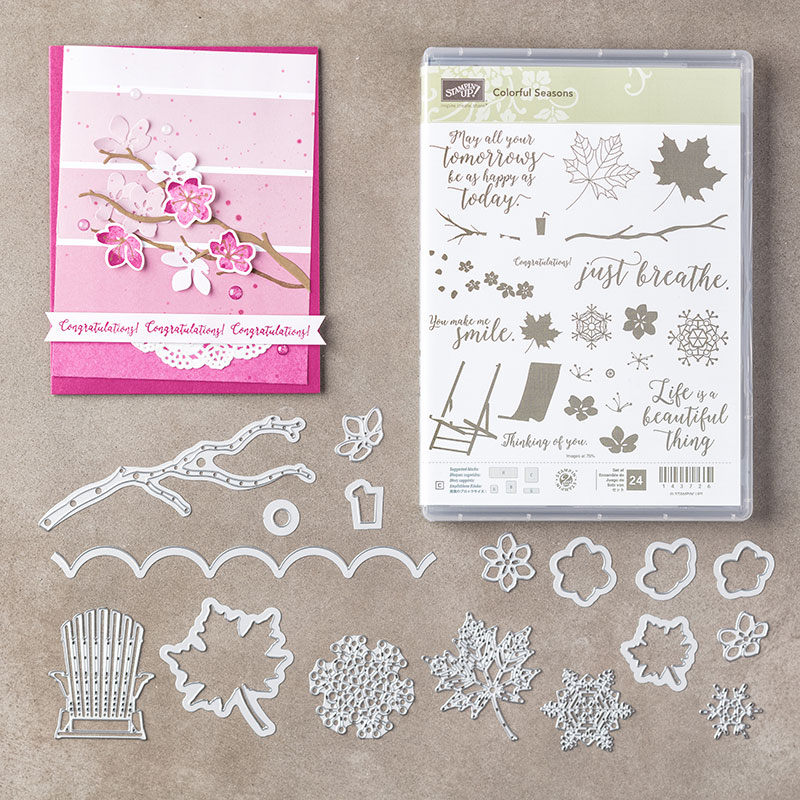
Colorful Seasons Clear Mount Bundle.
 Order HERE


    Tuesday, August 1, 2017

    Carols of Christmas Early Launch and August Updates


    It seems impossible that it is already August.  Hopes of cooler weather and a sparkling, joyful holiday are dancing in my head.  There is so much to do, to create, it seems overwhelming.  But thanks to Stampin' Up!, I received my Carols of Christmas set in July and had a chance to play, just a little, with it.  

    The really exciting news, is that anyone and everyone can now order this great bundle now.  It is an Early Release to give you a taste of the gorgeous things Stampin' Up! has in store for us with the September release of the holiday catalog.  

    The Carols of Christmas Clear Mount Bundle (here) is a great way to kick off the season.  It features 13 stamps and 11 thinlit dies.  I have already seen dozens of incredible videos and Pinterest posts of talented crafters who have already made projects with this set.  

    Bundles and individual item's numbers are also available at my My Stampin' Up! store. (here)  Order early and start having fun!   


    Here are just a few of the cards I have made with the set.  See earlier post HERE!

    Make sure you sign up for upcoming newsletter HERE.  I am preparing some specials and tutorials to share with you soon!  

    Vintage Leaves Photopolymer Stamp SetDid you earn Bonus Coupons in July? Now's the time to spend them!  

    Vintage Leaves Photopolymer Stamp Set
    Leaflets Framelits DiesAugust is the month to spend your coupons on some wonderful new stamps or dies.  Or use them to refill your basic supplies, adhesives, inks or paper.  Whatever you decide...just be sure to use the coupons before August is over.    Find out more about redeeming your coupons
    HERE.

    Here's a great set of stamps that seem just perfect for beginning to make some fabulous fall cards and gift sets. The Vintage Leaves Photopolymer Stamp Set coordinates with the Leaflets Framelits Dies to let you create projects for fall you will treasure!


    Another of my  favorite stamp/ die bundles  for fall is  the Coffee Cafe bundle, teamed with the oh so cute Designer paper.   Check out this cute bundle HERE.  The warm, comfy color palette and the fun stamps will be perfect for scrapbook layouts, cards and lots of great treats and gift card holder over the fall and holiday seasons ahead.

    Coffee Break Designer Series Paper

    Tuesday, July 18, 2017

    Easy Step Card Tutorial using Stampin' Up!'s Whole Lot of Lovely Papers


    This card features the charming Whole Lot of Lovely Papers from Stampin' Up! and is oh, so easy to make.   The flower diecuts and sentiment are from the Beautiful Bouquet Bundle.  

    I have done a quick video, showing you how to cut the card base and layer the designer papers.  It really is a very easy card to make, but creates a great "keep me out forever" type stand up card that is sure to make the recipient smile.

    I have included the template and instructions for the base on this post.    I can just imagine all the fun themes, from summer birthdays, to thinking of you, to Christmas.  This style card will surely become a treasured keepsake. 

    Please, have fun creating your own Step Cards.  It really is addictive!
    Molly D 
    Beautiful Bouquet Bundle.  
    Layering Circle Framelits Dies
    Layered Circle Dies

    Monday, July 17, 2017

    Tab Labels for Stampin' Up! Catalog


    Okay, it may seem just a little over the top, but I spent a few minutes recently and made myself some Tabs for the newest Stampin Up! catalog.

    Using the Circle Tab Punch, I cut out the tabs for the pages that I own something on.  I used Lemon Lime Twist for most.  Berry Burst was used for the pages that featured papers and colors.  Then, just sprinkled in a few Soft Sky for Embellishments  and Ribbon pages, and Tranquil Tide for Tools and Basics

    Originally, I typed just the titles I owned, but retyped the set combining front and back names, since I seem to be adding all to quickly to my stash.  

    I got the original idea from a wonderful demonstrator's video by Connie Stewart.  Her labels are very clean, organized and I love the type she used.  When it came to making mine, I found I wanted a bit more info, so my labels are not as clean looking as hers, since the type sizes vary.  But they are really helping me find things much quicker.  

    Now I need to tell you, I used my Silhouette to cut mine out.  I wanted to adhere adhesive backed sheets before I cut and didn't want to gum up my circle punch.  
    Plus, I find the Silhouette got the job done in a fraction of the time.  That's why the background is gray. It made it easier for me to use the trace feature for cutting.  The labels are arranged on the sheet to allow room for Silhouette registration marks as well. 
    If you use a Silhouette and would like the file, just let me know.  Plus, you could change out the names you would prefer to use.  

    Well, anyhow, I am enjoying my new tabs, and want to thank Connie for her inspiration and generosity in sharing!  She has a link on her video, if  you would like to download hers.  Just love them!

    Circle Tab Punch143754
    Price$18.00

    Punches are a quick and easy way to add interest and depth to your projects. And there’s no better way to cut out stamped images—many of our stamp sets have coordinating punches. Fold over the punched-out piece to create a tab that can then be stamped on. Use tabs for organizing, gift packaging, gift tags, and more.

    * Our punches are high quality, affordable, and easy to use
    * Sleek body style
    * Large surface area offers precise cutting and leverage
    * Locks to store
    * Slim and stackable


    Have fun crafting!
    Molly D

    Thursday, July 13, 2017

    Having fun with Touches of Textures Stamp Set


    The Touches of Texture stamp set from Stampin' Up! is so much fun to play with.  From the sophisticated, impressionist florals to the grungy, yet delicate accent stamps, it is a very rich palette of styles that allow you to create beautiful cards with lots of depth and texture. 

    I had so much fun playing with these, I did a video to share just how easy it was.

    This set is so large it takes two boxes to hold it.  And each and every stamp in it is sure to become a favorite to be used over and over again.  

    Once i got started making these Thank You cards, I just couldn't stop.  I used several colors including:  Flirty Flamingo, Berry Burst, Daffodil Delight, Dapper Denim, Sweet Sugarplum and Calypso Coral.  

    I started by cutting a card base of each color.  I just cut each into half, leaving me with two pieces, each 5 1/2" tall by 8 1/2" wide.  Then I scored at 4 1/4" and used my bone folder to get a sharp crease.

    From Very Vanilla cardstock, I cut layers for the inside of each card, 4" wide by 5 1/4" tall.
    Also from the Vanilla cardstock I cut two pieces for the front of the cards. 
    One piece was approximately 2 3/4" wide by 5" tall.  That was the layer  I used to stamp the flowers and accent stamps onto.  The other piece was just 1" by 3".  I used the Thank You stamp from the Daisy Delight Stamp set.

    Then on most of the cards I used Old Olive cardstock to cut the backing for the layers.
    Those pieces would be 3" wide by 5 1/4" tall and 1 1/4" by 3 1/4" for the smaller background behind the thank you.  

    Each card base was first stamped in the matching color ink with floral stamps to give it a subtle print.  Then the same ink colors were used to stamp the flowers and most of the grunge stamps.  I did use Crumb Cake to stamp the little jumbled alphabet stamp, just to add a more grungy look on some of the cards.  No two are alike.  I just had fun stamping and playing with the colors.  

    So take a minute and enjoy the video.  And be sure to visit my Stampin' Up! store.  I named my store and Facebook page escapetoinspiration, and I hope this set will inspire you to just take some time to play with color and get a little inky.

    Have fun crafting!
    Molly D


    Carols of Christmas Cards


     I know I say it too often, but this newest set from Stampin' Up! is one of my favorites!    I just love the vintage typography on the greetings  And their larger size helps add a pop of fun to a card in a hurry.

    As an independent demonstrator for Stampin' Up! I was able to purchase the stamp and die set below it's official launch. 
    And boy oh boy, am I glad I did.


    Both of the over sized sentiments are just perfect for cards, but as a scrapbooker I love them.  They will both be perfect for page titles or embellishment pieces on any holiday layout.  

    The two different stamped background papers you see on the cards were made using some great background stamps.  One is the Brushstrokes stamp and the other is the Diagonal Stripe.  

    These two stamps are going to get a lot of mileage over the next few months.  I can just see  them in fall colors, copper embossing, done in dramatic ombre effects. 
    I just can't wait to play more with these sets.

    I will definitely be doing some more projects and videos using these fun new additions to my stash!  Please visit My Stampin' Up! store for any of your Stampin' Up! needs.  The Carols of Christmas sets won't be available for just a little while yet.  But that shouldn't stop you from getting ahead on making some easy and colorful backgrounds with these great background stamps.
    Brushstrokes Clear-Mount Background Stamp
    Brushstroke Stamp


    Diagonal Stripe Clear-Mount Stamp
    Diagonal Stripe

    Just wanted to quickly share what I had fun creating today.  Hope you enjoy.

    Have fun crafting!
    Molly D


    Tuesday, June 27, 2017

    Easy Watercolor Background Techniques using Stampin' Up! Inks


    Oh my gosh golly, I have been having too much fun playing with all the new inks and colors from Stampin' Up!  And while I love these great products, these techniques would probably work with other die based inks.  Just want to warn you, it's pretty addictive.  And you may get a little color on yours hands...of course, I consider that an added bonus, lololol.
    So, anywho, here are a few closeups of some of the cards I made with the backgrounds. The how-to video is posted above.  I loved using the rich inks from Stampin' Up!.  The colors are so vibrant and intense.  I hope you enjoy. 

    Dragonfly Dreams Photopolymer Stamp SetDetailed Dragonfly Thinlits DiesThe gorgeous dragonflies you see on several of the items are made with the gorgeousDetailed Dragonfly Dies and Dragonfly Dreams Stamps.  I just love using these.  I haven't even played with largest one or the bee yet!  Just can't wait!


    And if you are interested in any of these items, be sure to visit my online store HERE.


     So, as always...have fun crafting!


    Saturday, June 24, 2017

     I made two quick and easy Z Fold cards yesterday, using the Big on Birthday Stamps and Delightful Daisies Designer Series Papers.  Just wanted to share with you how super duper easy making fun fold cards can be. I've attached the video so you can see just how simple making these cards is!

    This fold is one of the easiest I have seen, yet lets you use bits and pieces of designer paper, to give it a "wow" impact.  And even as easy as this it to make, the fold and surprise reveal gives it a pop of fun for the receiver.  


    The Stamp set, Big on Birthdays, is super fun and
    Big On Birthdays Photopolymer Stamp SetDelightful Daisy Designer Series Paperjust as the name implies, has big, bold stamps that pack a punch.  But, it also has great smaller stamps to round out your birthday message. See it in the catalog HERE!

    And if you haven't already seen the gorgeous new Delightful Daisies papers, here's a quick peek.  Be sure to check out the great collection HERE!

    Collection has great papers, stamps and an incredible punch that you will love!

    I hope you enjoy making some fun, fancy fold cards and be sure to Follow and Like my Facebook page  HERE!

    Thank you so much for stopping in, and as always...have fun crafting!


    Wednesday, June 21, 2017

    Scrapbook Layout using Whole Lot of Lovely from Stampin' Up!


    True story. I wanted to make some cards with this gorgeous paper collection from Stampin' Up! Took out everything I thought I would need, the Lovely Friends stamp set and the Whole Lot of Lovely Designer Series Papers and some matching solid papers and inks. .And about an hour later, I ended up with this scrapbook layout. 

    If you haven't seen my latest video on Youtube, I shared the news that I have become an Independent Stampin' Up! Demonstrator.  What does that mean?  I originally signed onto a team to get a discount on my Stampin' Up! orders.  Easy to do and no strings attached.  But once I got my first two orders in, I admit it, I was hooked.  

    Yes, I know, I have a craft room overflowing with beautiful papers and supplies.  So why order from Stampin' Up! ?   The papers!  The quality!  The colors!  Everything is so beautifully coordinated and great quality.  

    I have been having fun the last two days making some cards and this quick layout.  And wanted to share my excitement with you.  I will be doing a tutorial on some cards using this paper line and stamps soon.  But I couldn't wait to share this layout.  Just so cheery and bright.  

    If you are interested in shopping in my Stampin' Up! store, the link is HERE.

    And please follow my Facebook page...escapetoinspiration HERE .

    Oh well, the night is young...off to making some cards now...teeheehee.
    Have fun crafting!
    Molly D


    Sunday, May 7, 2017

    May Happy Planner Labels with Watercolor Florals

     Well, I'm trying to take my own advice and learn something new everyday.  

    These may just look like ordinary Happy Planner labels to you, but to me they are something I learned how to do today.  I had been wanting to make some planner labels that were not just rectangular, but I love putting quotes and "talking to myself" motivational ramblings in my planner.  So I decided to up my game a little and teach myself how to think "outside of the box".  

    Of course I am still having so much fun discovering and playing with all the beautiful florals from the bundle I bought from Creative Market recently.  So I used those as the starting point, along with my Silhouette and created these really rather easy labels. 


    I hope you can see in the pictures how the florals spill out over the borders of the boxes.  No, I didn't fussy cut them, I let the Silhouette do all the work.  Okay, all the work after I designed them.  And that was where the learning something new came in.  

    Here's a tutorial I did showing how I created these:


    I posted below, some screen shots of the Silhouette mats with and without the cut lines to show you how I laid them out.  I do have a wide format printer, so I was able to use 12 x 12 paper, but you could just as easily lay them out on an 8 1/2 by 11 format.


    Here's the layout without the cut lines and below is the screenshot of the layout showing where the cut lines will be.
    Have fun creating today!  And learning something new!
    Molly


    Tuesday, April 18, 2017

    Planner Printables for Digital Watercolor Bundle

    Well, I was hoping to get a tutorial done today showing how I use downloaded digital files to make planner labels and scrapbook embellishments.  Unfortunately, once I started cleaning and doing some small housework projects, time got away from me.  BUT, I did manage t make some new labels for my
    Big Happy Planner.

    I used the beautiful graphics I bought from Creative Market, and had so much fun just playing.  As you can tell from the thoughts on the labels, I was in a very, very happy mood.  Playing with color and flowers and trying to learn new digital skills.  I was in Heaven!   So I wanted to share them with you,  I hope you enjoy.


    The flowers used on these labels came from the Huge-Floral-Graphic-Bundle sold on Creative Market.
    I hope you are having a wonderful Spring, and are having fun crafting. Hope I get more crafting done tomorrow!

    Enjoy!
    Molly

    Beautiful Flower Graphics Package Deal for Crafting Designs

    Good Morning!  I am so excited to start the day crafting.  I found this gorgeous, over the moon beautiful graphics bundle on Creative Market.  I usually hate paying for graphics, but this bundle has the most glorious collection of watercolor florals and backgound papers, so I splurged and bought it.  I haven't really started getting to creative with it, but I did make a new background for my desktop, and I pictured it above.

    Stayed up late last night, downloading all the files and opening each one to see just how jammed packed it was.  Now I don't work for Creative Market, and don't usually like to push any product, but....I do like to share things I think others may enjoy.  And this kit is one of those things. Most often, I just download the freebies from sites like these, but decided that $35 for a huge, and I mean huge bundle, was a great deal.

    Plus, the license lets me use the graphics to create things I can include in scrapbook kits or other crafty projects for sale.  So, in my mind, this kit will pay for itself, right?  Well that's my story and I'm sticking to it.

    So anywho, if you like digital graphics and flowers and watercolor, you might want to check this bundle out!
    I hope to be doing a video later today, after a little housecleaning, of how to download and use graphics like these.  Wish me luck.

    And I hope you have a wonderful day crafting.
    Molly

    Here's the link to this site:  Creative Market
    Watercolor Floral Graphic Bundle - Illustrations